Video Walkthrough
Open Pintheon on localhost
Once the Pintheon Container is up and running, it will be accessible by opening a browser to: https://127.0.01:9999/admin. To access it follow the instructions below.
On first run, the ssl certificate will be saved on your system at the following locations:
- Windows:
C:/Users/<username>/pintheon_data/ssl/pintheon-rootCa.crt - MacOS:
/Users/<username>/pintheon_data/ssl/pintheon-rootCa.crt - Linux:
/home/<username>/pintheon_data/ssl/pintheon-rootCa.crt
Installing the SSL Certificate
Google Chrome/Chromium
- Open Chrome and go to
chrome://settings/certificates - Select the "Authorities" tab
- Click "Import" and navigate to your certificate file:
- Windows:
C:/Users/<username>/pintheon_data/ssl/pintheon-rootCa.crt - MacOS:
/Users/<username>/pintheon_data/ssl/pintheon-rootCa.crt - Linux:
/home/<username>/pintheon_data/ssl/pintheon-rootCa.crt
- Windows:
- Check "Trust this certificate for identifying websites"
- Click "OK" and restart Chrome
Mozilla Firefox
- Open Firefox and go to
about:preferences#privacy - Scroll down and click "View Certificates"
- Go to the "Authorities" tab
- Click "Import..." and select your certificate file
- Check "Trust this CA to identify websites"
- Click "OK" and restart Firefox
Microsoft Edge
- Open Edge and go to
edge://settings/privacy - Click on "Manage certificates"
- Go to the "Authorities" tab
- Click "Import" and select your certificate file
- Check "Trust this certificate for identifying websites"
- Click "OK" and restart Edge
Safari (MacOS only)
- Open Keychain Access (Applications > Utilities > Keychain Access)
- Select "System" keychain
- Go to File > Import Items...
- Select your certificate file
- Double-click the imported certificate
- Expand "Trust" and set "When using this certificate" to "Always Trust"
- Close the window, enter your password, and restart Safari
Launch UI
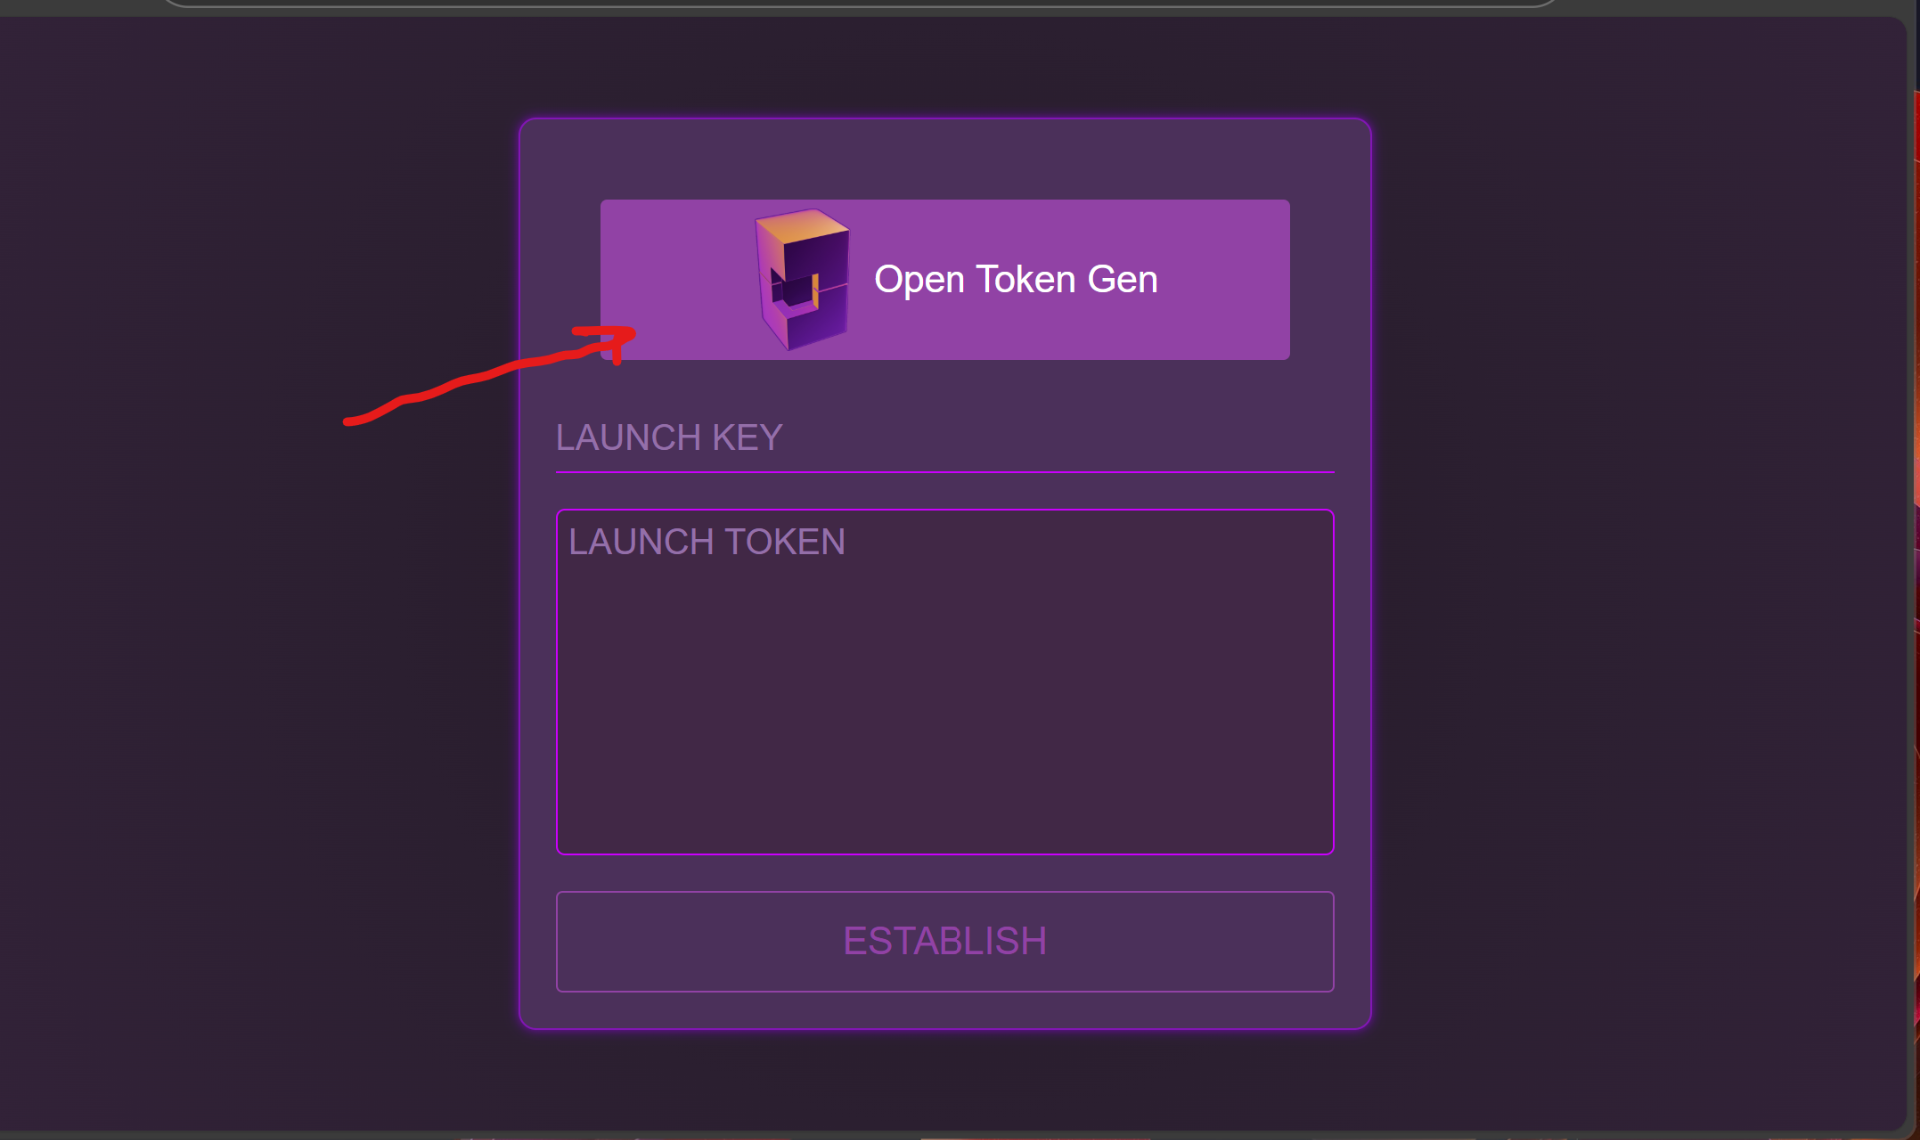
In order to launch your node, you must have a launch key and token. Click the 'Open Token Gen' button, and the Token Generation app will be opened in a new tab.
Launch Token Generator
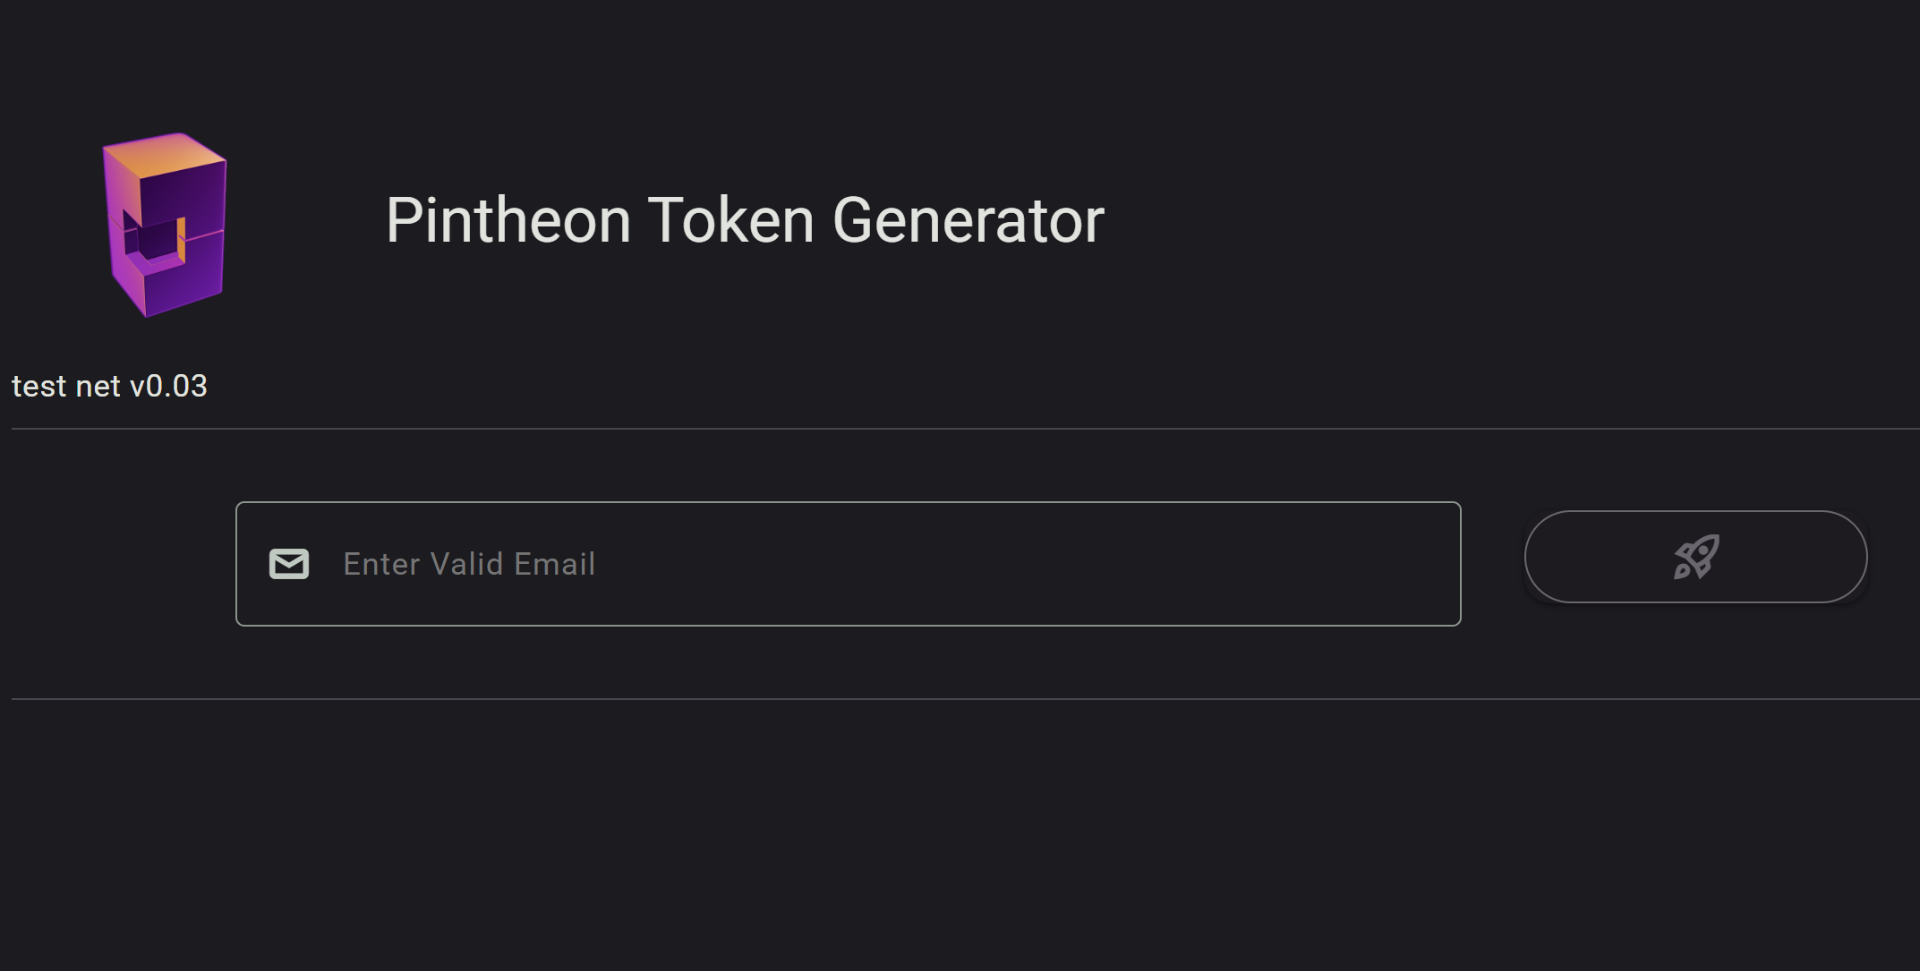
Enter a valid email address, and then click the launch button.
Fund the node
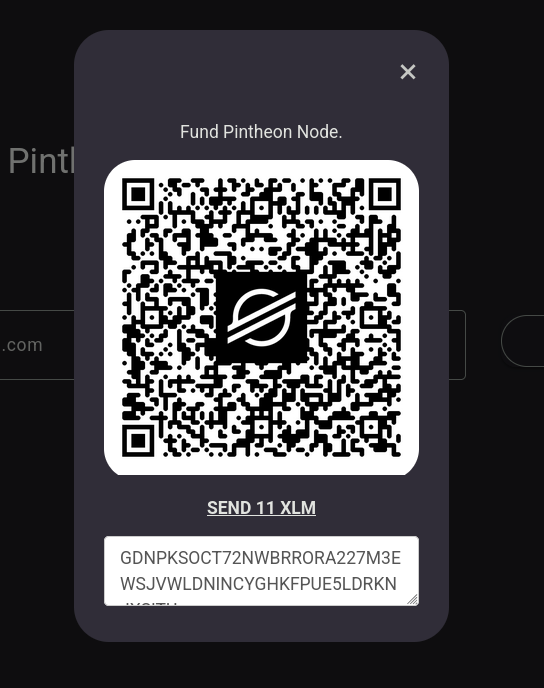
You'll be presented with a prompt to fund the new node using XLM.
Copy Launch Token from UI
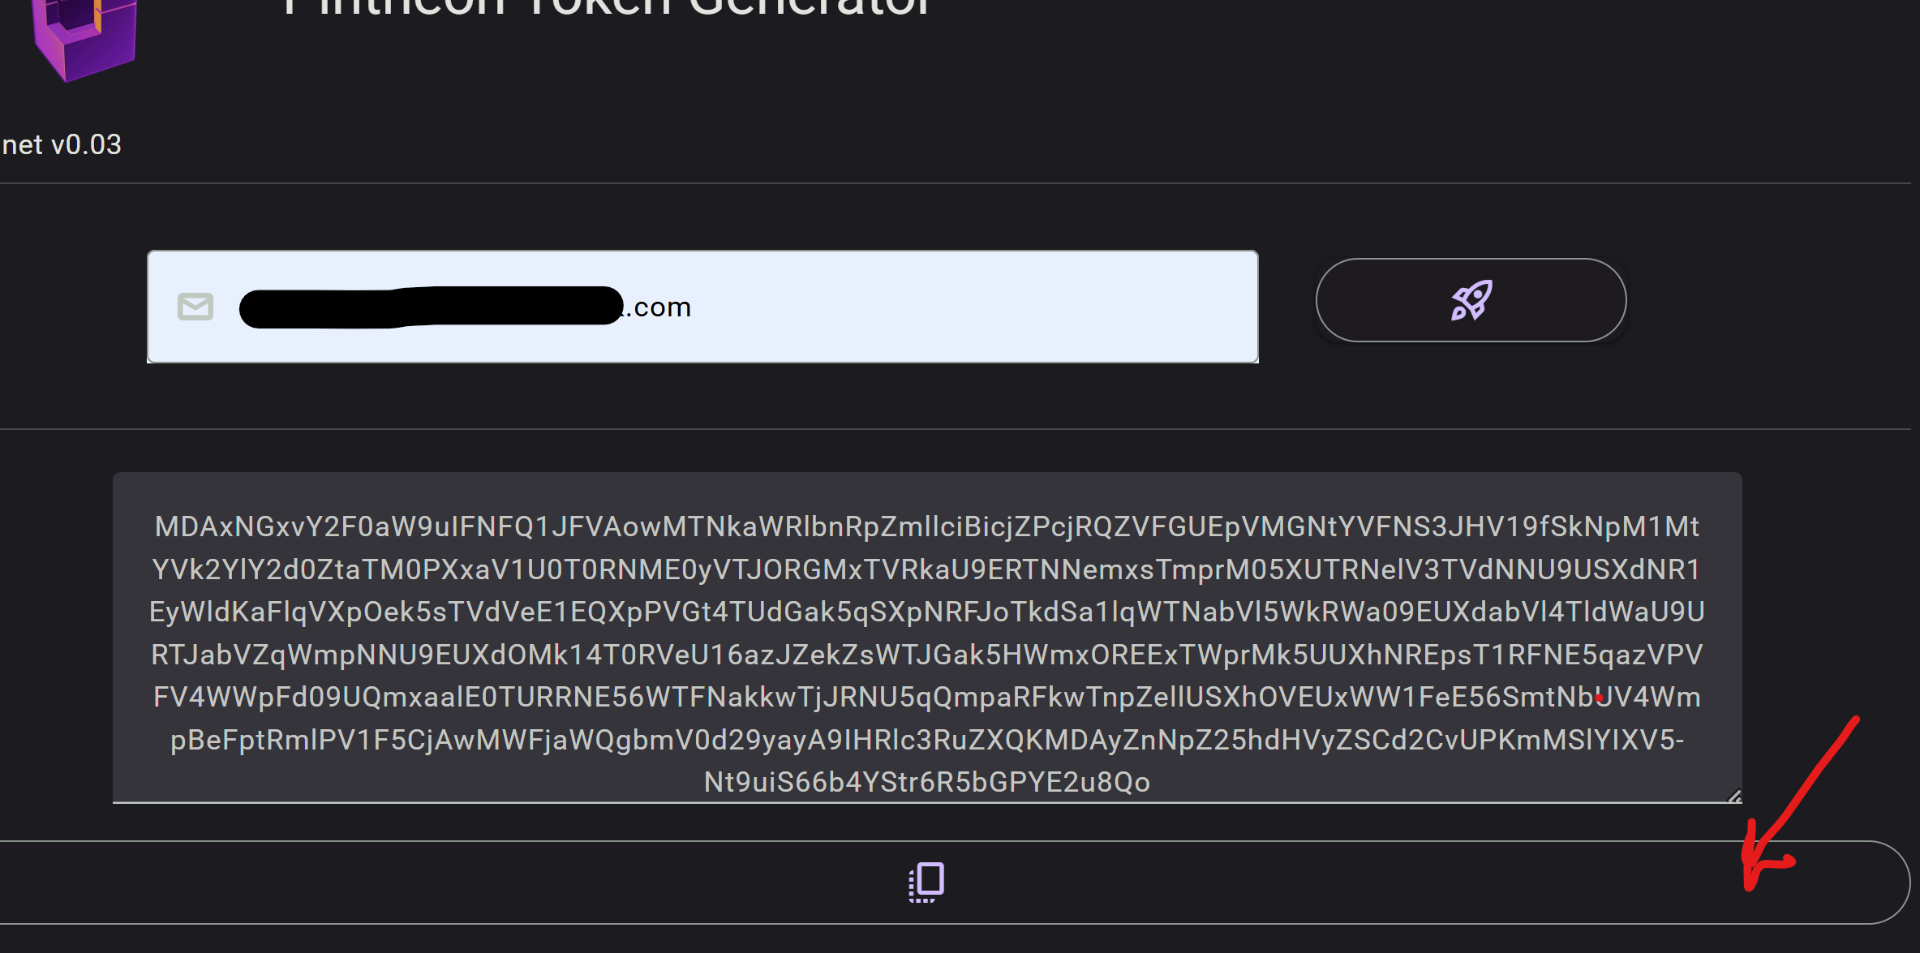
Once node is funded, a token will be generated, which can be copied to the clipboard.
Copy Launch Key from email
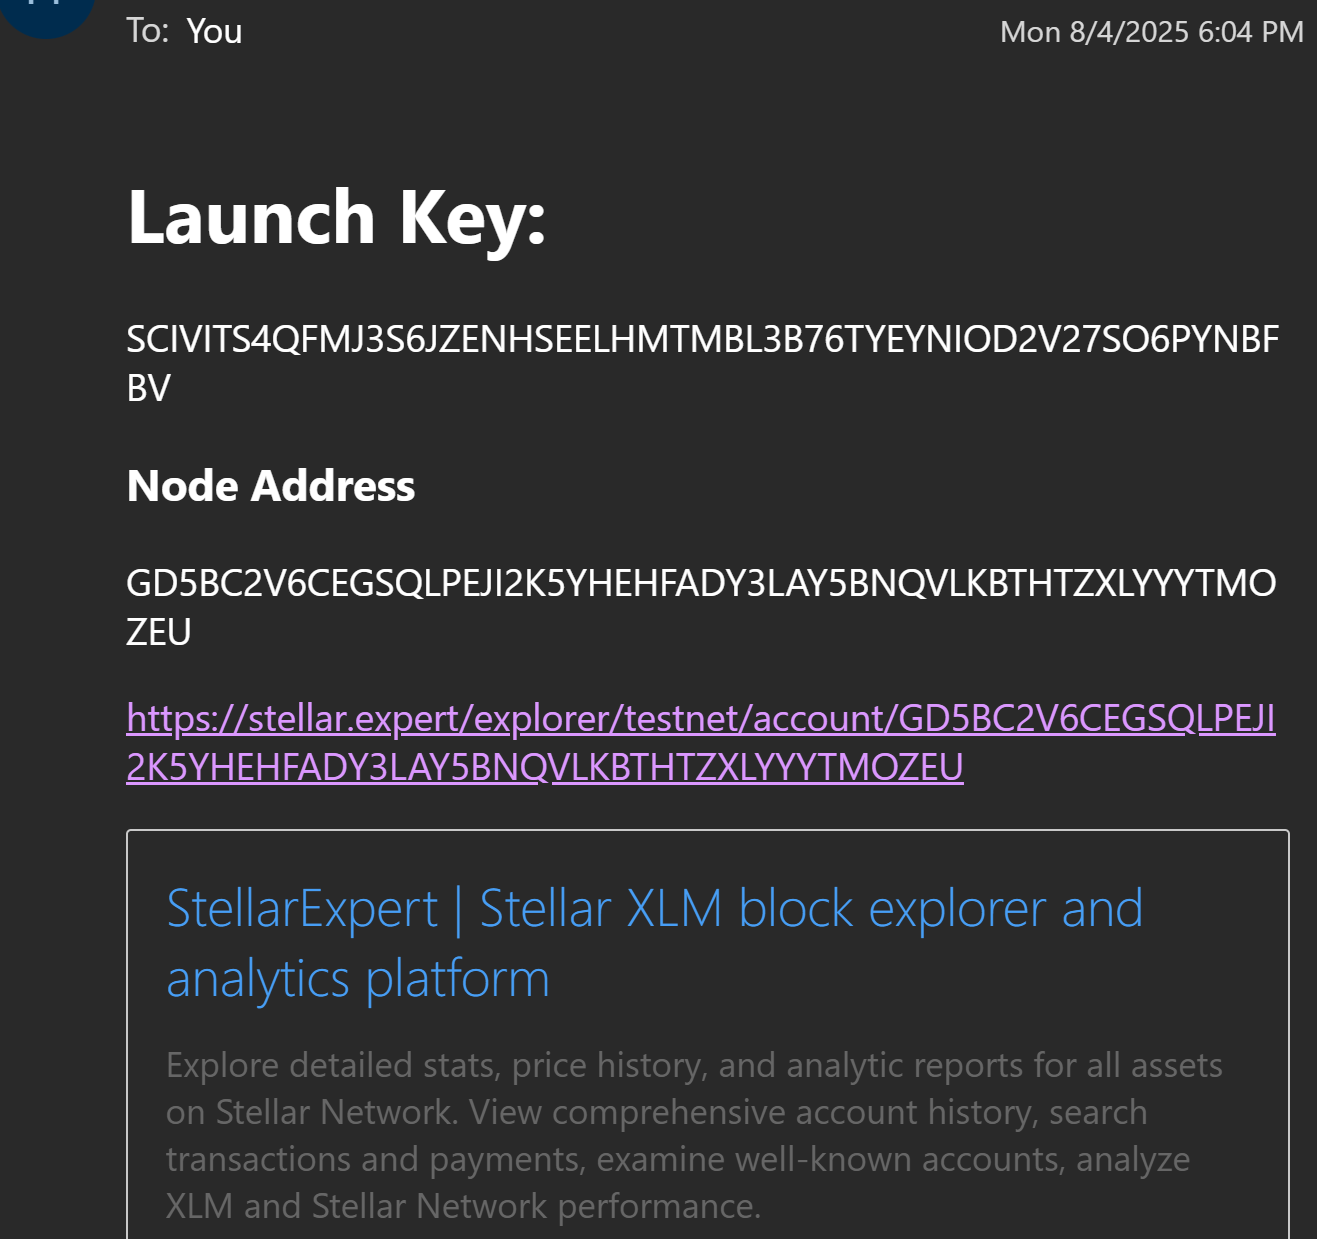
Your launch key will be sent to the provided email address. Along with the address of your node on the Stellar network. The node is pre-funded with xlm to cover the launch fees. You'll need to keep this address funded to perform additional network actions.
Paste Launch token and key
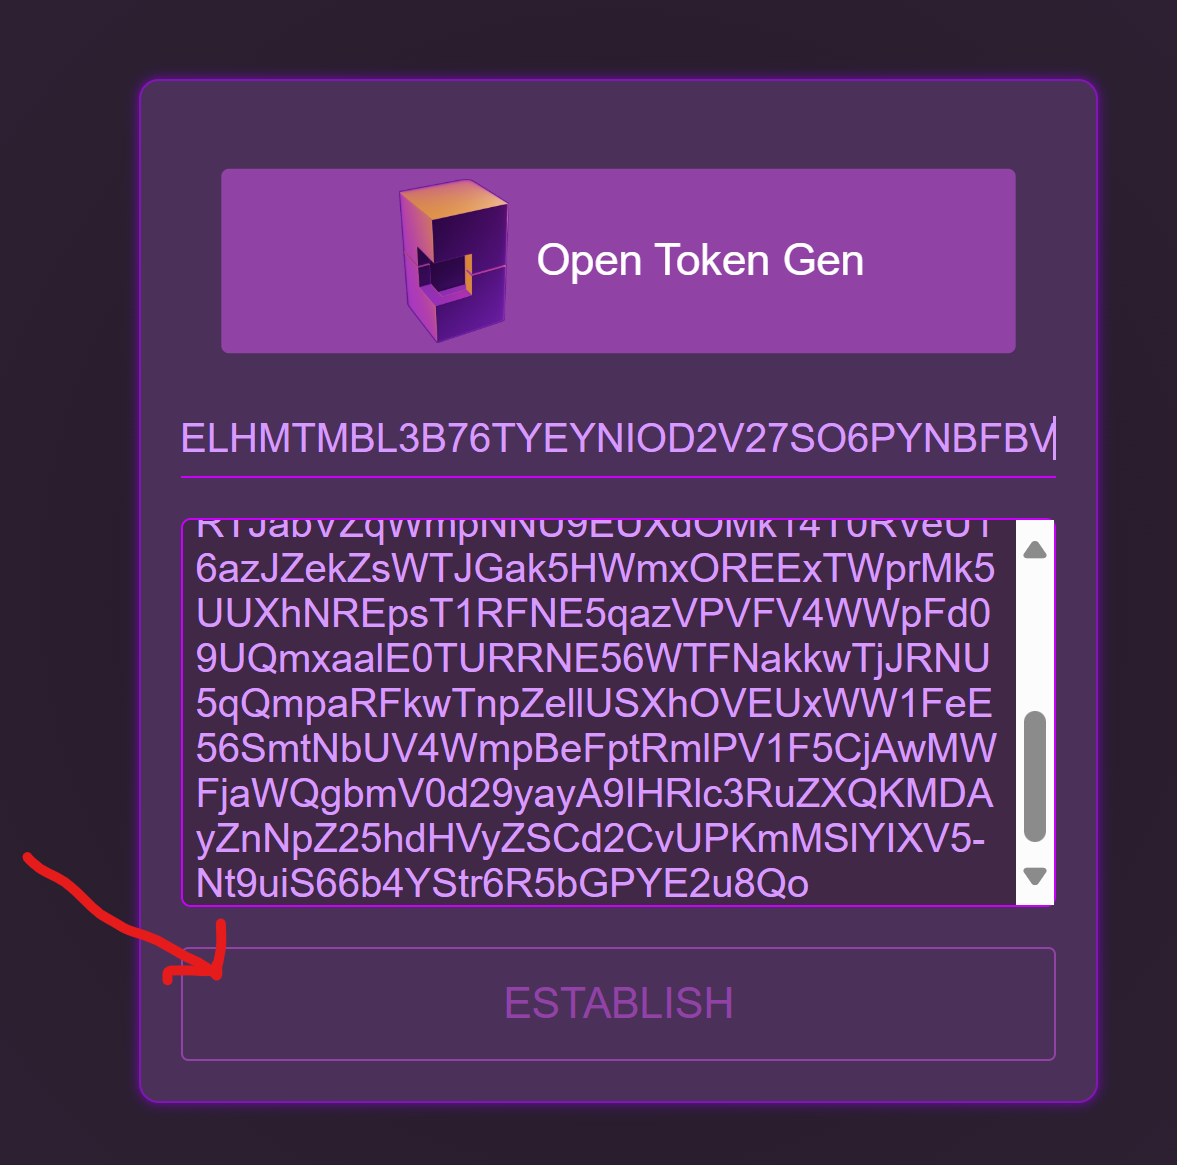
Paste both the launch token and key into their related fields, and click the 'Establish' button.
Establish Node on Network
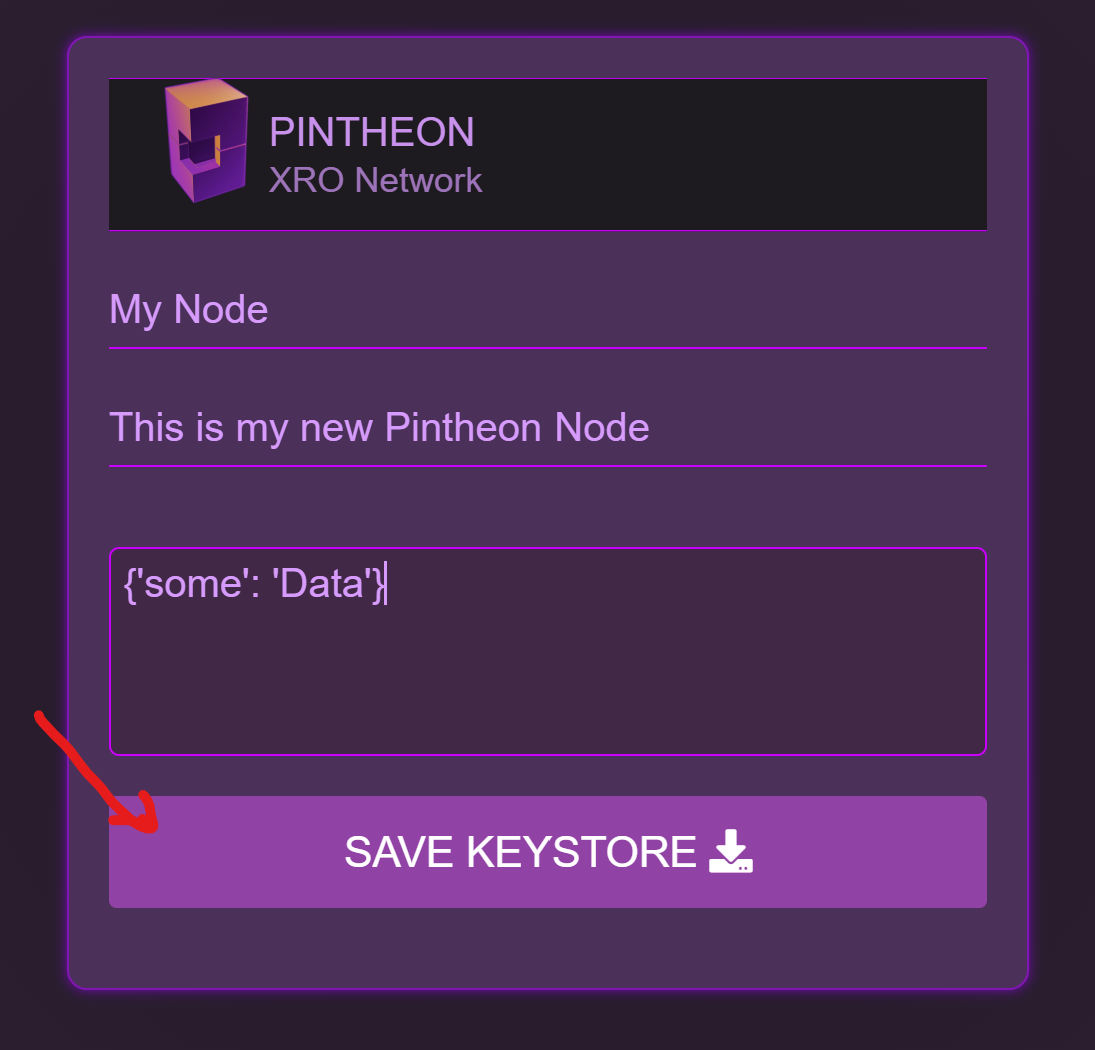
Enter a unique name for your node, a description, and some optional meta data. Then click the 'Save Keystore' button, to establish your node data on the Stellar Network.
Save Node Keystore
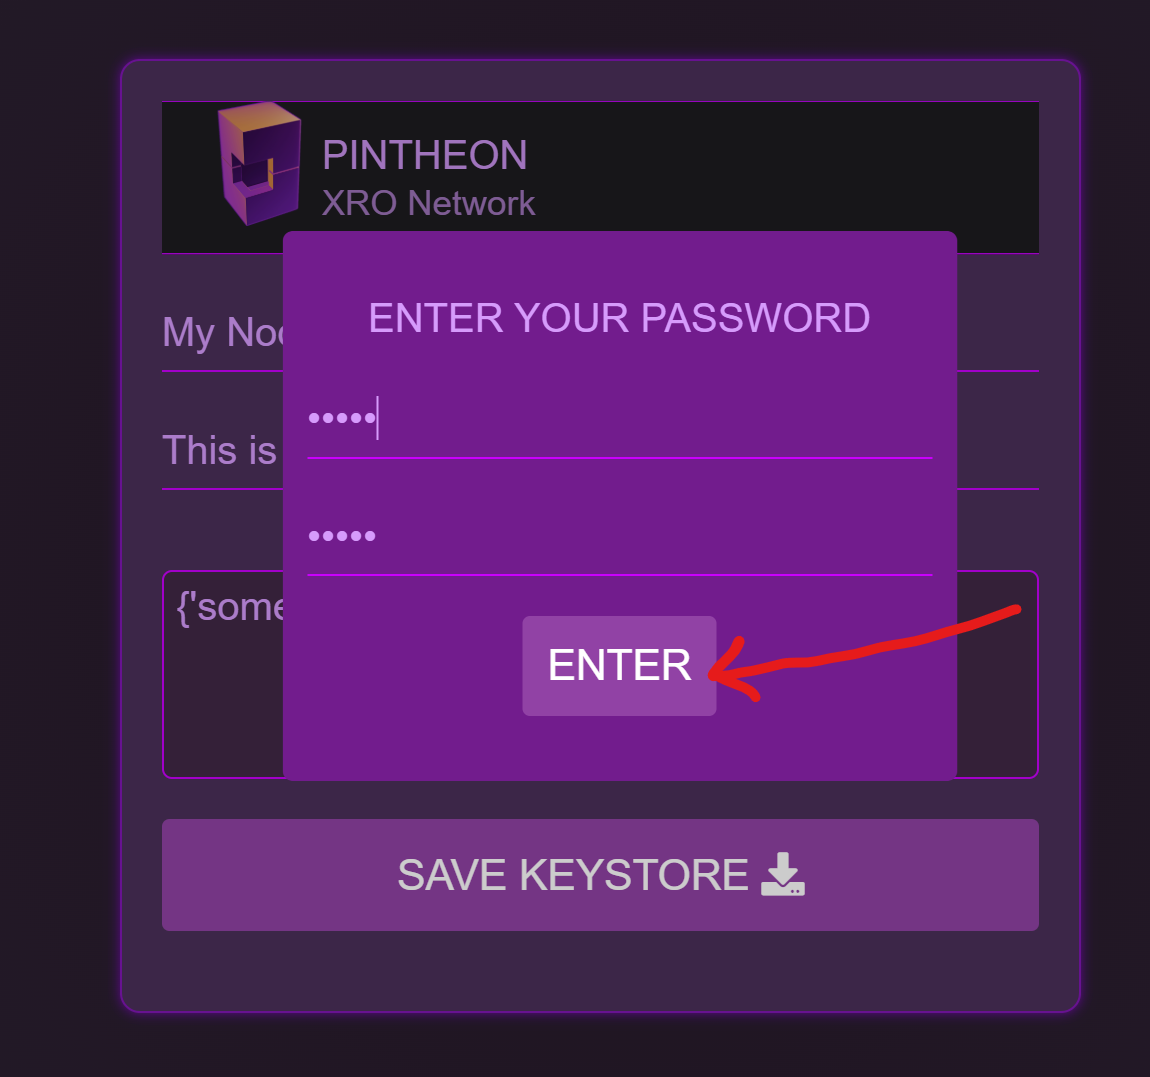
You will be prompted to enter a password. This will create an encrypted keystore file. DO NOT lose your password, or the file, it is required to enter the dashboard of your node.
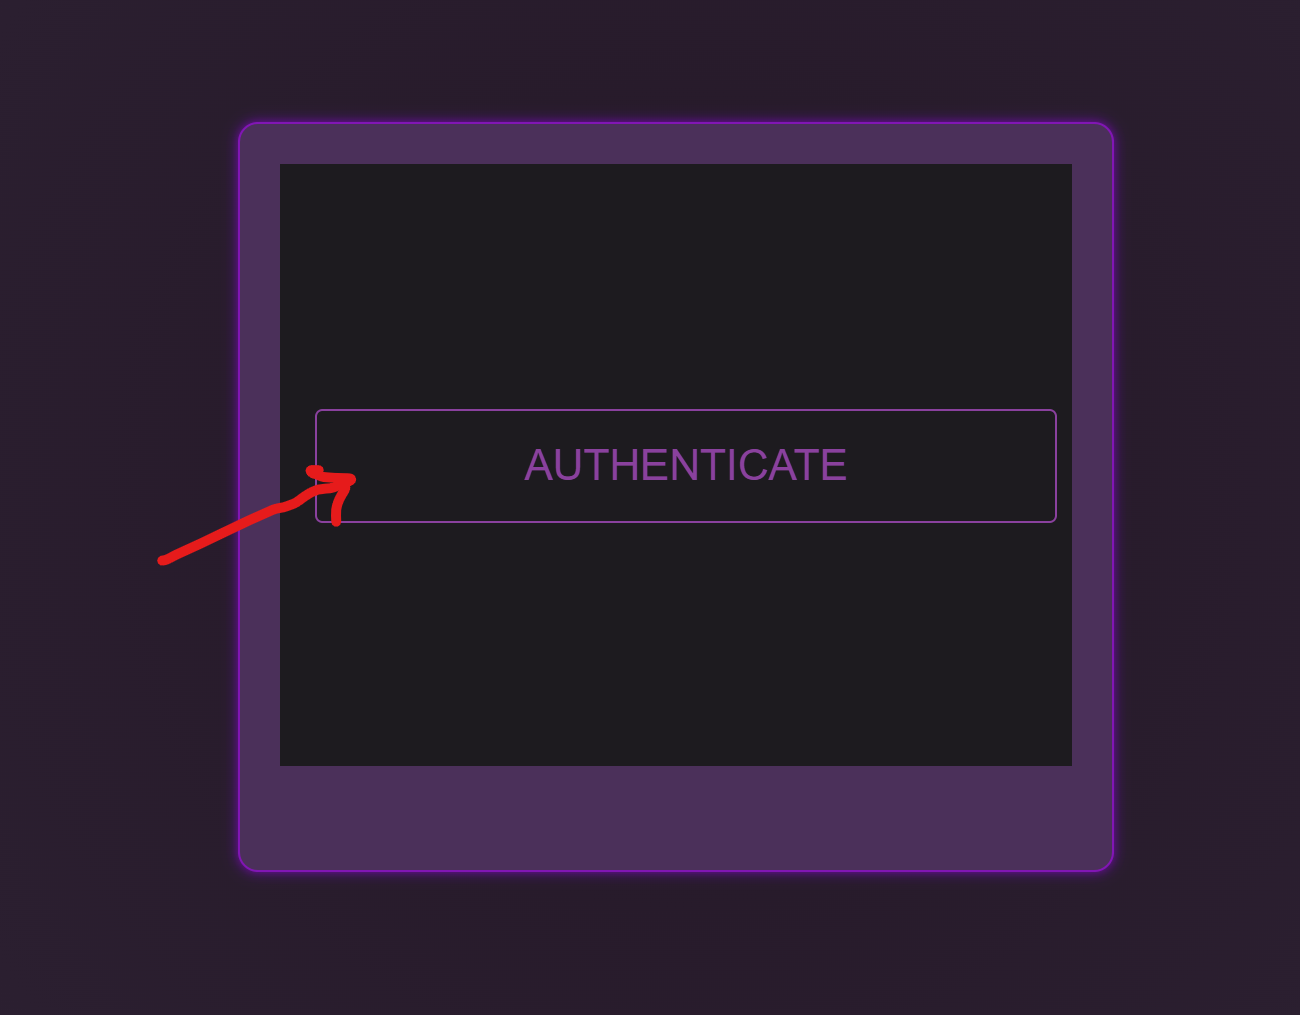
Load Keystore to login to Node
After the encrypted keystore is generated and downloaded, you'll be redirected to the 'Authenticate' page. From here you can click the 'Authenticate' button, enter your password, and select you encrypted keystore file. Which will log you into the dashboard.